
Adjusting Reed Gaps

Originally posted May 2014
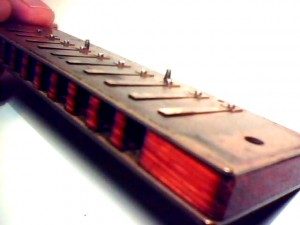
reed_gapHere’s an introduction to adjusting your reed gaps for better response, less air leakage, and easier bending. This technique is also essential for learning to overblow.

I recommend you experiment on an old harp, then move on to your good harps once you’ve had some practice.

What You’ll Need:
Old Harmonica
Small Screwdriver
Small slip of thin paper (receipt?)
Paperclip

What’s the Gap?
The reed “gap,” or “offset,” refers to angle of the reed above the reedplate. If you take the covers off and look at the reeds from different angles, you’ll see a small shadow along each reed. That’s the gap.

If the gap is too high, the reed will require more force to play, because more air is allowed to escape. As the gap is lowered, it takes less and less air to get the reed moving. In effect, the reed begins to respond more quickly. However, if you set the gap too low, it will jam, and refuse to play at normal volume. If you set a gap too low, you’ll need to lift the reed out of the slot slightly.

What To Aim For
Ideally, you’ll set the gap of each reed so that it plays easily at normal volume, but doesn’t leak air unnecessarily. Relatively speaking, lower pitched reeds like 1-3 need slightly wider gaps than middle-range reeds such as 4-7, while the high reeds, like 8-10, can be set even closer to the reedplate.

Remove Coverplates
Remove the coverplates with a small screwdriver. If you have a Marine Band that’s assembled with nails, you’ll need to do a little more research to learn how to take apart and reassemble your instrument. I can’t cover that here, so make your first gapping experiments on harps that are assembled with screws.

Visible Draw Reeds
You’ll see your draw reeds on outside of your lower reedplate. Each reed is attached with a rivet, with the other end swinging freely up and down like a diving board.

Press Near the Rivet
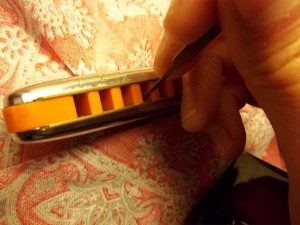
Most players have trouble controlling the 2 and 3 draw, so for your first experiment, use your thumbnail to press those draw reeds down closer into their slots. Press gently at the base of the reed, near the rivet pad, to avoid bending or curving the reed. We’d like to change the angle of the reed as it extends from the base, lowering it down slightly closer to the slot.

Plink the Reed
After you press the reed, use the edge of a piece of paper to flick the end of the reed up gently, making a “plink” sound. This will help the reed settle.

Play the Reed
Test the reed you’ve adjusted by playing the draw note. Try bending. Notice any changes. If there’s no change, press the reed (gently) closer into the slot, always applying pressure near the rivet end, then plink it again and play it.

Reed Won’t Play
At some point, you’ll probably press the reed too far into the slot. Never fear! Straighten out your paper clip or use your small screwdriver to reach deep inside the harp, through the comb (where you’d normally blow), and press the reed back outward again, always aiming your pressure so that it’s close to the rivet end of the reed. Raise the reed gap so that it again lies slightly above the edge of the reed plate, and it should play again. Always plink after making adjustments, to help the reed settle.

Super Close Isn’t Always Better
I think it’s generally a good idea to lower your gaps slightly for improved performance, but remember, if they’re too close, the reeds won’t play if you hit them hard. You probably play harder than you realize, so be sure to test any adjustments using both loud AND soft playing, so you’ll have a realistic sense of the reed’s response.

I know that when I first started adjust reed gaps, I set them all way too close, then realized I was getting frustrated because they’d stick whenever I tried to play them. Learn from my mistakes! Adjust your reeds slightly closer, but leave SOME gap, or they won’t play. Remember to plink constantly to help them settle.

Adjusting Blow Reeds
Your blow reeds are mounted inside the top reedplate. From the outside, you’ll see the slots with the reeds below them, inside the harp. You can adjust them without disassembling your harp – reach inside with a tool and press them upward into the slot to decrease the gap, or work from outside to increase the gap by pressing down through the slot (into the harp). You can’t plink the blow reeds while they’re still mounted to the comb, but for quick adjustment, this is the way to get started.

Think In Pairs
To improve bending, change the draw AND the blow for the hole in question.

Test the Limits
Adjusting your reed gaps can improve performance significantly, but it takes practice and each reed has to be tested. Go ahead and push one in too far on purpose, just to test the limits – press the reed all the way into the slot so it definitely won’t play, then test it, and bring it back by pressing outward from the opposite side. If you do this a few times, you’ll gain confidence that you’re not ruining anything permanently by adjusting your reed gaps.

Further Study
If you enjoying tinkering with your harmonicas and want to learn more about “harp tech,” I recommend visiting Richard Sleigh’s website HotRodHarmonicas.com Richard is a top customizer and I’ve learned a lot from his instructional materials. I’ve received no money to make this endorsement – it’s just a fact. Using his tools and techniques, my harps now work better and they’ve allowed me to improve as a player.
More Movies

Originally posted April 2014

store_screenshotI’ve been pretty busy with weekly lessons and performances, but in the last month and a half I managed to film and edit my next downloadable harmonica lesson video. This time, it’s an hour-long workshop on playing clear single notes.
Visit the Store for Previews and Downloads.

Just as with my previous lesson on bending, the bundle comes in three parts – the video lesson, a PDF e-booklet, and an audio-only version suitable for car practice or for students with limited vision. It’s a bargain at just $10.

With these two tutorials, I’ve laid out the core techniques for beginner and intermediate playing. Next on the agenda is what to DO with these techniques. Upcoming lessons should cover the next steps: position playing, modes, pentatonic scales, blues riffs and theory, Irish tunes. I’d also like to lay out some basic music theory, note reading, and ear training.

Do you have any lesson requests? Let me know.

Cross Harp Ear Training with Shania Twain

Originally posted April 2014

shania-300x227I received a request for the harp solo from Shania Twain’s 1995 song “No One Needs to Know” from a reader named Alexus. I don’t have time to do a transcription, but if you have the right harps in hand, it might be a good project for you, the reader, to get some practice figuring things out by ear.
Even if you’re not a modern country fan, the info below and the general approach will help you with any cross harp song.

First, you’ll need to listen to it, so – here's the song.

Harp Keys:

From 0:00-2:00ish, it’s a high F harmonica

From 2:00ish – end, it’s a high G harmonica

Position:

The position is “cross harp,” also known as second position, and the scale being used is the major pentatonic scale.

That means the home base is the low draw chord, and your strong melody notes are going to be -2, -3, -4 and 6. Note that on the low end, your chord tones are all draw notes, except for that 6 blow.

The licks you hear will frequently use a whole step bend on the 3 draw, followed by a slide over to 2 draw or 4 draw on the same breath.

Major Pentatonic Scale:

To warm up, practice the major pentatonic scale in cross harp. Here’s the tab:

Low octave:

-2 -3″ -3 -4 5 6

6 5 -4 -3 -3″ -2

High octave:

6 -6 -7 -8 8 9

9 8 -8 -7 -6 6

Some Extra Low Notes
(not a full scale, but still useful)

-2 2 -1 2 -2

The Process:

Pick up your high F harp for the first half of the song. Listen for long, sustained harmonica notes, and try to match those pitches. Then switch to the high G for the second half of the song after the key change.

For the longer runs that contain more notes, it’ll probably be bits of the major pentatonic scale, starting on one of your cross harp chord tones: -2,-3,-4, 6.

One more thought: this tune requires two slightly weird harp keys, an F and a high G, which makes me think I probably oughta do another exercise like this using a song that calls for more widely-owned keys, like C, A, D, or regular low G. I’ll put that idea in the hopper and get to it later.

Anyhow, have fun and happy experimenting!

Howard Levy Workshop

Originally posted April 2014

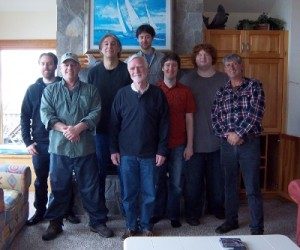
duck_group-300x250This past week, I traveled from chilly New England down to the small coastal town of Duck, on the Outer Banks of North Carolina, for a 5-day harmonica workshop with jazz virtuoso Howard Levy. The setting was beautiful. A beach house with big windows overlooking the ocean waves, a stormy sky, sea birds flying by.
Where Ya From?
Howard traveled to us from Chicago, and the rest of us flew and drove in from NYC, Philly, north Georgia, New Hampshire, Connecticut, plus one student who flew in from Mexico but lives most of the year in the Yukon Territory in Alaska.

Technical Background
Five of us were overblow / pucker players who use tongue blocking for octaves, one was primarily a TB player who also used TB overblows, and one student got his first whisper of an OB on the 6 blow with coaching and reed adjustment by Howard. Congrats, Tom!

Tunes
Over the course of several days, we worked with tunes ranging from jazz standards, to Bach, blues, bluegrass, Eastern European folk, swing, and a Hindustani raga.

One highlight, song-wise, was Howard’s spontaneous adaptation of a recording of a tune played by a Romanian musician whose instrument was a fish scale, mouth-blown like kids do with a blade of grass – it sounded kind of like an oboe. Howard played it in either the 7th or 10th position, and was able to achieve a remarkably similar sound by placing the melody notes on overblows and bending them up in imitation of the Baltic “upwards vibrato” sound.

Technique
Techniques we explored included sweep arpeggios, melodic breath patterns, rhythm harp articulations, and harp in a cup.

Naturally, to play the melodies, we also needed bends and overblows, and Howard gave us feedback and pointers where needed.

A frequent theme was the goal of maintaining a supported, connected sound while changing breath directions.

Scale Work
Over the course of the workshop, we started out playing stuff using the diatonic modes, looked at some of the modes of the pentatonic scale, and to get further into jazz, we introduced the melodic minor scale and its modes.

Which Harp?
One of the great pleasures of playing diatonic harmonica is the art of experimenting with different harp keys and positions to find the one which best suits a particular tune. We played most of the workshop on C harps, for ease of naming notes, but branched out to match the standard keys for various tunes. A typical puzzle: Body and Soul shifts keys from Db to D to C – what key harp is the best to cover all three? Musical considerations aside, the mental challenge of key transposition is a great way to stave off Alzheimers, knock on wood.

Conclusion
I got some good stuff to work on, and gained insight into my own growing edges. An example: play longer 8th note lines with accents and full tone. As always, it was great to gather with other intrepid harmonica fanatics and talk shop. Margie from Class Acts on Tour was a fabulous host and cooked us amazing meals. Speaking for myself, Howard continues to inspire with his musical genius, his care and generosity as a teacher, and his commitment to playing soulful music without limits.

Irish Harmonica – Ms McLeod’s Reel

Originally posted March 2014

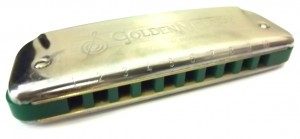
golden_melody_green_comb-300x139Happy Saint Patrick’s Day! In honor of the day, I’ve posted the tab for a new Irish fiddle tune – Ms McLeod’s Reel.
Listen to the wee demo I recorded this afternoon, using diatonic harmonica, banjo ukulele, and acoustic guitar.

My arrangement uses a G harmonica, played in first position (straight harp). You can play it on any harmonica, the tab will sound fine, but you’ll want to use a G if you try it out at your local session.

Ready to play? Put on your green socks and head over to Ms McLeod’s harmonica tab page!

How to Learn Songs

Originally posted March 2014

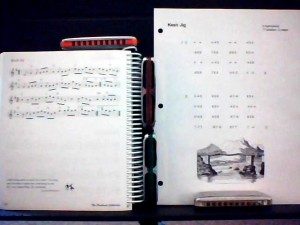
sheet_music_tab_2-300x225This article is a response to an email from Oisin, a harmonica player from Dublin, Ireland. He wrote to say that he plays a little bit, but has trouble learning songs.
Whistle, Sing, Hum
Probably the best thing to help you learn songs by ear is to sing, whistle, and hum them to yourself. If you can perform a tune even roughly with your voice or by whistling, it’ll make searching and experimenting go a lot faster on the harp. Once you’ve figured out a tune accurately by ear, hurrah! You’re free to wander the land as a free-reed troubadour, unencumbered by songbooks and tab pages. If you’re not quite sure if you’ve got it right, listen to somebody else play it, and consult an accurate tab or piece of sheet music.

Improve Your Single Notes
Many of my students have reported that working on getting clear single notes has helped them to learn melodies. I recommend using a pucker technique, as described in my videos and blog. But even without single notes, if you aim for the right starting note and get the blows and draws in the right order, it should still sound pretty good. For extra polish, work on cleaning up your single notes, and it’ll sound great.

Tab and Sheet Music
Finally, as a failsafe, you’ll want to either learn to read music on the harp, or at least use accurate tab pages, such as those found on my Tabs page.

Numerical tablature, or “tab,” is quick to learn, and tells you which holes to play, whether to blow or draw, and if a bend is required. It doesn’t tell you much about rhythm, but can communicate a little bit about when to pause, by leaving space between phrases.

Sheet music takes a bit longer to learn, but its dots and lines will tell you the exact note names and rhythms, which are universal on all instruments. Then it’s up to you to learn where those notes are located on your harp. It’s slow going at first, but each tune you learn this way will come a little bit faster.

Conclusion
Basically, there are two parts to learning a song. First, get clear on exactly how the song goes, either by whistling/singing/humming or by consulting an accurate tab or piece of sheet music. Then work on playing it so it sounds good to your ears. For extra credit, practice slowly, using clear single notes.

Harp Key and Capo Position

Originally posted Feb 2014

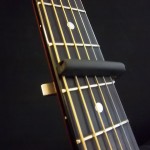
guitar_capo-150x150I get a lot of requests for Dylan and Neil Young songs, and I do what I can, but you can actually figure out a lot of this stuff yourself through experimentation, by listening to the recording with a harp in your hand, blowing along and trying to match the sound.
The big question becomes: what key harp are they using? Dylan, Neil Young, Springsteen and other rockers who play harp in a rack usually play mostly straight harp, also known as first position. That means, if you can figure out the key of the song, you’ll have the harp key also.

You can look up a guitar tab for the song and usually the first or last chord will match the key of the song. Sometimes, however, there’s a capo involved. A capo is a clamp placed on the neck of the guitar to make the same chords sound higher.

Without a capo, a C chord is just a C chord. Place a capo on the 1st fret however, and now a C chord sounds like a C# chord. Place a capo on 2nd fret and your C chord sounds like a D chord. Move the capo to 3rd fret and your C chord sounds like an Eb chord. Move the capo to 4th fret and your C chord sounds like an E chord.

For example, you look up a Dylan song whose guitar part includes the chords C F G and Am. Music theory and common practice will tell you that given these chords, the song is probably in the key of C.

Now, if this is a song that uses a capo placed at the 4th fret, you’re still using CFG and Am shapes, but you’ve moved the actual sound up to the key of E.

So you’d want an E harp for that song, since Dylan typically plays a harp in the same key as the song (straight harp, 1st position).

Now you can sit back, listen to the tune, blow around on your harp, and start trying to match the sounds you hear.

That intermediate step of figuring out the key is the tricky one, so feel free to ask your guitarist / pianist friends what key a song is in, or learn a little bit about capo position on guitar and you can determine it yourself.

Good luck and have fun!

Now I’m Making Movies

Originally posted Jan 2014

store_screenshotIf you’ve watched my 5-minute Youtube lesson videos and thought it’d be cool to take lessons with me one day, I’ve got something new for you.

Downloadable Harmonica Lesson Videos

Head over to the Store page, and for a fraction of the cost of a regular lesson with me, just $10, you can download a video lesson and tab page on the subject of your choice. I’ve opened the series with a lesson on bending, and I plan to continue with videos on single note technique, position playing, basic tongue blocking, blues for beginners, and more. If you have lesson suggestions, I’d love to hear them.

Fixing A Stuck Reed

Originally posted Dec 2013

stuck_reedA reader named Alena wrote in to ask about her 4 draw. She said her 5 draw was nice and clear but 4 wasn’t playing. From her description, it sounded like maybe her 4 draw reed was stuck.
What To Do

Step 1: Puff In & Out
Try puffing air rapidly in and out on 4. Does that free it up? If not, use stronger air pressure. This does the trick most of the time.

Step 2: Toothpick
If still no response, poke a toothpick in hole 4 at a downward angle. You don’t have to reach far in; aim close to the hole opening. It’ll either unstick the draw reed or confirm that there IS no reed (sometimes they break).

Blow Reeds
These instructions will work for a blow reed also, but you’ll want to poke the toothpick in at an UPWARD angle and aim for the far end, deep inside the harp.

Preventing Stuck Reeds

Clean Mouth
Play with a clean mouth! If drinking anything other than water, swish with water before playing. After eating, clean your mouth: brush, floss, and rinse with water to avoid getting dried burrito inside your harp.

Warm Harmonica
In the winter, it can also help to warm your harp in your pocket for a minute or two before playing, to raise it closer to body temperature and prevent jams caused by condensation.

Which Key For My Tabs?

Originally posted Nov 2013

which_harp-300x225If you’ve been using my Tabs page, you may have noticed that I don’t always tell you which key harmonica to use.

For some songs, I don’t specify a key because there isn’t an “official” key for the song. It will work on any harp, and you can choose any key you’d like. As long as you’re playing solo, by yourself, it will always sound fine.

When you’re playing with someone else, or when you play along with a famous recording, I try to be more specific about key, because in THAT case, you’ll notice if you’re not playing in the same key.

Sometimes I make mistakes! In those cases, I’ve forgetten to list a key on a song where it matters, but in general, I only list keys for certain songs.

So, to conclude, you’ll always sound fine when you’re playing by yourself, and you get to choose which harp to use. But if you’re playing with a friend, or with a recording, it’s important to play in the compatible key.

I hope that helps clarify my approach!

This post was inspired by a question from a reader named Mauno. Thanks for writing in, Mauno!