Originally posted May 2014
 Here’s an introduction to adjusting your reed gaps for better response, less air leakage, and easier bending. This technique is also essential for learning to overblow.
I recommend you experiment on an old harp, then move on to your good harps once you’ve had some practice.
What You’ll Need:
Old Harmonica
Small Screwdriver
Small slip of thin paper (receipt?)
Paperclip
What’s the Gap?
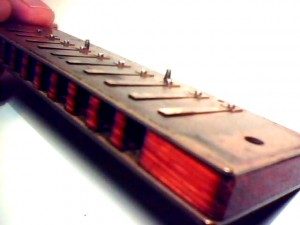
The reed “gap,” or “offset,” refers to angle of the reed above the reedplate. If you take the covers off and look at the reeds from different angles, you’ll see a small shadow along each reed. That’s the gap.
If the gap is too high, the reed will require more force to play, because more air is allowed to escape. As the gap is lowered, it takes less and less air to get the reed moving. In effect, the reed begins to respond more quickly. However, if you set the gap too low, it will jam, and refuse to play at normal volume. If you set a gap too low, you’ll need to lift the reed out of the slot slightly.
What To Aim For
Ideally, you’ll set the gap of each reed so that it plays easily at normal volume, but doesn’t leak air unnecessarily. Relatively speaking, lower pitched reeds like 1-3 need slightly wider gaps than middle-range reeds such as 4-7, while the high reeds, like 8-10, can be set even closer to the reedplate.
Remove Coverplates
Remove the coverplates with a small screwdriver. If you have a Marine Band that’s assembled with nails, you’ll need to do a little more research to learn how to take apart and reassemble your instrument. I can’t cover that here, so make your first gapping experiments on harps that are assembled with screws.
Visible Draw Reeds
You’ll see your draw reeds on outside of your lower reedplate. Each reed is attached with a rivet, with the other end swinging freely up and down like a diving board.
Press Near the Rivet
Most players have trouble controlling the 2 and 3 draw, so for your first experiment, use your thumbnail to press those draw reeds down closer into their slots. Press gently at the base of the reed, near the rivet pad, to avoid bending or curving the reed. We’d like to change the angle of the reed as it extends from the base, lowering it down slightly closer to the slot.
Plink the Reed
After you press the reed, use the edge of a piece of paper to flick the end of the reed up gently, making a “plink” sound. This will help the reed settle.
Play the Reed
Test the reed you’ve adjusted by playing the draw note. Try bending. Notice any changes. If there’s no change, press the reed (gently) closer into the slot, always applying pressure near the rivet end, then plink it again and play it.
Reed Won’t Play
At some point, you’ll probably press the reed too far into the slot. Never fear! Straighten out your paper clip or use your small screwdriver to reach deep inside the harp, through the comb (where you’d normally blow), and press the reed back outward again, always aiming your pressure so that it’s close to the rivet end of the reed. Raise the reed gap so that it again lies slightly above the edge of the reed plate, and it should play again. Always plink after making adjustments, to help the reed settle.
Super Close Isn’t Always Better
I think it’s generally a good idea to lower your gaps slightly for improved performance, but remember, if they’re too close, the reeds won’t play if you hit them hard. You probably play harder than you realize, so be sure to test any adjustments using both loud AND soft playing, so you’ll have a realistic sense of the reed’s response.
I know that when I first started adjust reed gaps, I set them all way too close, then realized I was getting frustrated because they’d stick whenever I tried to play them. Learn from my mistakes! Adjust your reeds slightly closer, but leave SOME gap, or they won’t play. Remember to plink constantly to help them settle.
Adjusting Blow Reeds
Your blow reeds are mounted inside the top reedplate. From the outside, you’ll see the slots with the reeds below them, inside the harp. You can adjust them without disassembling your harp – reach inside with a tool and press them upward into the slot to decrease the gap, or work from outside to increase the gap by pressing down through the slot (into the harp). You can’t plink the blow reeds while they’re still mounted to the comb, but for quick adjustment, this is the way to get started.
Think In Pairs
To improve bending, change the draw AND the blow for the hole in question.
Test the Limits
Adjusting your reed gaps can improve performance significantly, but it takes practice and each reed has to be tested. Go ahead and push one in too far on purpose, just to test the limits – press the reed all the way into the slot so it definitely won’t play, then test it, and bring it back by pressing outward from the opposite side. If you do this a few times, you’ll gain confidence that you’re not ruining anything permanently by adjusting your reed gaps.
Further Study
If you enjoying tinkering with your harmonicas and want to learn more about “harp tech,” I recommend visiting Richard Sleigh’s website HotRodHarmonicas.com Richard is a top customizer and I’ve learned a lot from his instructional materials. I’ve received no money to make this endorsement – it’s just a fact. Using his tools and techniques, my harps now work better and they’ve allowed me to improve as a player.